
Home
A Guide to Your Very Own DIY Hydroponic Garden at Home
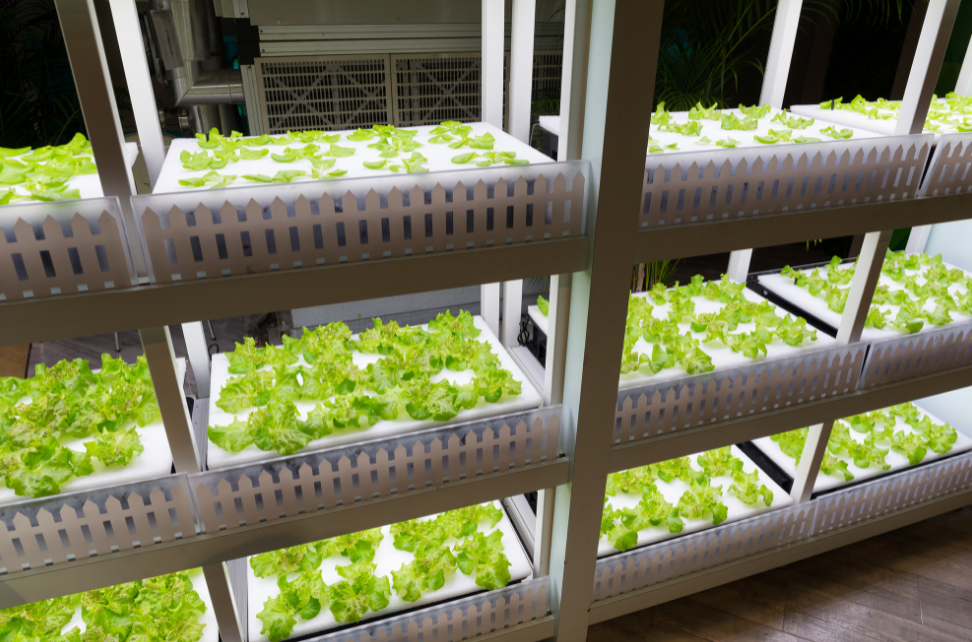
Caring for a garden provides a variety of benefits, from improving memory to boosting your mood to giving a sense of empowerment. But for most of us, gardening can only be done at certain times of the year, and that’s if we live in an environment hospitable to our preferred types of plants!
These obstacles might seem unavoidable, but there’s a way around them. When you want to grow plants that don’t mesh well with your location or the weather, a hydroponic garden can be a game-changer.
To learn how to create a DIY hydroponic garden, just keep reading!
Choose a Location
The first step is to choose the location for your garden. This can be indoors or outdoors, as long as it’s enclosed. So, for example, you could build it on a screened-in porch if you didn’t want to put it inside your home.
Just keep in mind that the lack of climate control will limit your options in terms of plants and growing season. An indoor hydroponic garden is better for gardeners interested in growing plants out of season.
Gather Your Materials
If you plan to order a hydroponic garden kit, such as those from Tower Farms, you can skip this step. However, those building from scratch will need to gather their materials before starting.
The specific list of materials you need will depend on the type of garden you want to build. Do you want a horizontal or vertical hydroponic garden?
As horizontal gardens are easier to build, let’s go over the materials needed for this type. You’ll need:
- Large food-grade plastic storage bin with cover
- An air pump
- Air stones
- Quarter-inch black tubing
- Fluorescent grow bulbs
- Net cups for seedlings
- Timer
- Hydroponic nutrients
- Seeds and starter plugs
Assemble Your Garden
Once you have your materials, it’s time to assemble your garden. First, drill holes into the container lid where your net cups will rest. Be sure to keep your holes small enough that the pots don’t fall through.
Next, assemble the air pump with the stones and tubing, according to the instructions on the packaging. The pump must remain above water.
At this point, go ahead and place your container where you want the garden to rest, as it will be difficult to move after adding the water. Fill the container almost to the top, leaving 1-2 centimeters of space, then add the hydroponic nutrients.
Plugin the air pump and put your air stone in the container, securing the lid afterward. All that’s left is to put your plants or seeds in their net cups and place them to rest in the holes in the lid!
Nourish Your Plants All Year Round With a Hydroponic Garden
With a hydroponic garden, there’s no need to wait until spring to start gardening! You can grow a wide variety of plants inside your home all year round.
You can even decrease your trips to the grocery store by growing high-quality, nutritious fruits, veggies, and herbs right in your own hydroponic herb garden. And the best part is, you can do it all without spending a fortune.
Interested in learning more about honing your green thumb? Take a look at our blog!


![[pii_email_4c910535350b5a41ee81] Error Code Resolved](https://wigily.com/wp-content/uploads/2020/09/pii_email_4c910535350b5a41ee81-Error-Code-Resolved.jpg)